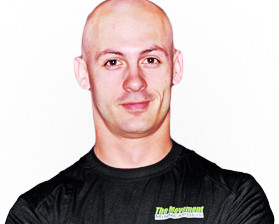

ddn

David Dellanave

  • Blog
  • Programs
  • Coaching
  • Seminars
  • Contact

by david Leave a Comment

How to Stay Healthy for Strength Training

How to Stay Healthy for Strength Training

As you can probably imagine, moving a million pounds of total volume in just a month pours on a fair amount of stress. For context, I’ve lifted six times in the past six days, and accumulated more total volume than any of the six-person teams currently doing the challenge at The Movement.

You might think that I’m well on my way to injury, or that I’m doing a lot of pre-hab, correctives, or soft tissue work to stay healthy. But I’m not doing any of that bullshit, and I won’t get hurt.

I’m confident I can keep loading on the volume not because my form is perfect, I’ve done the right warm-ups, or because I’ve dutifully done my corrective exercises.

The reason people get hurt lifting is not because of what and how but what and when.

The exact same movement done the exact same way one day can be the movement that hurts you the next day. Which is why so many injuries seem so random, so sudden, and so unpredictable. Sure we try to explain it after the fact that our form felt off, or it was because of what you did the day before, or whatever. And maybe that is true, or maybe it’s just ex post facto.

The actual reason for most training injuries is that you did something at a time when your body couldn’t handle that stress.

If only you could have known that it was a bad time to do it, you could have avoided it.

But you can.

​The core benefit of using biofeedback to test your movements and exercise is a way to filter out the things that your body is responding badly to right now. If you test negatively to a deadlift with just the bar, how do you suppose your body is going to respond when you load double bodyweight onto the bar? Yeah sure you might get away with it in the sense that you don’t become aware of an acute injury, but your stress load and margin for error is going to be right at the very edge.

Over the years I’ve had countless people come back to me and say “David, I really wanted to do frogger thrusters but they didn’t test well so I did them anyway, and that’s when I felt a pop in my back.” I never like hearing these stories, but I’ve heard enough of them that it’s important to note.

Let me state this as plainly as possible:

I have not found a single more effective way to avoid injury than to test all your movement with biofeedback.

No screening strategy, no stretching protocol or system, no corrective exercise model, nothing is even remotely as effective as simply testing all your movement, doing what tests well, and modifying or skipping what doesn’t.

Despite the many, many attempts there is no way to reliably predict if someone is going to get hurt. Movement screens don’t work. But we can know right now, from one moment to the next how you’re actually responding to movement.

Corrective exercise systems fail for the same reason. They’re not reliable or predictive because they assume everyone responds the same way to the correctives. If it’s a “corrective” it’s good for you, right? No, because if it doesn’t test well then it’s just bad movement. On the flip side all movement that tests well is corrective. You know what is a great corrective exercise for posture? A heavy deadlift (that tests well.)

Biofeedback is like my secret weapon when it comes to staying healthy and being able to continue training consistently, even at extreme volumes and frequencies.

If you’re not testing all your movement my only question is, why not?

Filed Under: Blog

by david 5 Comments

Turn Up The Volume

Turn Up The Volume

Every November we dust off the Million Pound November challenge at my gym. The quick description of it is that it’s a team effort (teams of six this year) to lift a million pounds of volume in one month. This challenge was born out of a something I undertook many years ago to do it by myself.

This year up until October 31st I had no intention of doing it myself, but one of my gym members asked me if I was doing Million Pound November at the exact right moment and I said: “Well. Yeah, I think I am.”

It’s hard. Alone it works out to be 33,334 pounds of lifting every single day of the month. In a team of six it works out to about 14,000 pounds over 12 workouts. Much more manageable, but still requires consistency.

Anyway, my point in all of this is that I want to create some context for those volume numbers, because total training volume is one of the absolute most important variables in training, and yet one that most people never give any thought to.

Did you know that most humans eat between three and five pounds of food per day? Whether you eat all your meals from the value menu at McD’s or fresh vegetables and hunted game, you probably eat around the same total weight of food per day.

There’s an inherent relationship between hunger, satiety, food density and volume.

As there is with lifting volume.

Most workouts, whether a bodybuilding plan, a heavy low-rep powerlifting session, or a high-density metabolic circuit come in around 10-15,000lbs. You’ll “feel” a workout around this volume as something that was fairly easy to accomplish and you likely won’t feel beat up after it.

Around 20,000lbs is where a workout gets harder just to complete it. You can again “feel” when you’ve crossed into this territory. You’ll also notice a significant difference in your results when you’re regularly hitting this kind of volume.

Finally, at 30,000lbs and above you’re in an entirely different orbit. It’s sort of the workout equivalent of eating 10 pounds of food. You can do it, but you’re going to work hard for it. It requires shifting gears, lowering overall intensities to ranges you wouldn’t normally train in. Believe it or not, once you’ve crossed this threshold it’s not that hard to double, or even triple it. In the same way that once you know how to pace yourself to run five miles, you can pretty easily run ten or fifteen.

Paying attention-to and manipulating total volume can be an extremely powerful lever in your training. If you haven’t been making much progress, try literally doubling your average workout volume. Things will change, believe me.

In case you’ve never paid any attention to volume, it’s simple to calculate. Simply multiply the total number of reps by the weight moved. Let’s say you deadlift 350 for 3 sets of 8 reps. 350 * 24 = 8500. Do this for all your movements and add it all up.

I’d encourage you to go back through your notebook for the past few weeks and calculate your volume. I’d bet it’s under 10,000 on average. Now you know one big thing you can manipulate for better results.

For my part, I’m 154k pounds into the month, and I haven’t trained yet today. On Wednesday I’ll explain how I use biofeedback to stay healthy with so much volume.

Filed Under: Blog

by david 12 Comments

3 Tips for Lifting While Sorting Through SI Joint Pain

If you suffer from SI joint pain, chances are you’ve been locked into the same ranges of motion for too long. Shift your mindset in training to find a resolution.

Lifters with ambitious goals are more susceptible to SI Joint injury because of the unique loading that heavy deadlifting, squatting, and swinging place on the lumbo-pelvic-hip complex. And, if perfect form were enough to avoid problems, some of the best fitness professionals in the world wouldn’t be suffering the same fate.

I have been exceptionally lucky (possibly even exceptionally smart), but in the years since I’ve adopted a eustress training model, I’ve avoided injuries — save for one. That first and only was a sacroiliac (SI) joint injury from doing something unforgivably stupid in the gym. I did multiple sets of multiple reps of deadlifts at a percentage of 1RM higher than I normally would. On the second rep of the third set of 545, a small firecracker went off in my lower back. By the next day, I couldn’t bend over to put my shoes on.

SI joint pain does not usually begin the way it did for me, with an acute injury. The sensation often begins slowly, with pain radiating down one leg or on one side of the lower back. And, strangely, much of the time those who experience SI joint pain are fairly experienced lifters who use good form (think: a flat or lordodic lower back, good extension throughout the spine and strong hips. Yet pain is present during deadlifts or squats; some people are even in what my friend Frankie Faires calls omni-contextual pain (meaning pain no matter what they’re doing).

The typical advice is to do mobility and corrective work, or to try to resolve strength asymmetries, but I’ve discovered a faster way. Eight weeks after my injury, I pulled a Jefferson Lift of 605 to break an IAWA world record that had stood for over a decade. Just a couple months after that, I cracked the 600 barrier for the first time more conventionally with a 603lb sumo deadlift in competition at a bodyweight of 193.

How, you may ask? The shift in mindset required for resolving this type of pain is understanding what you are doing, what you’re not doing (this is important), working within your limits, moving what’s not moving, and adding more variety of movement to your repertoire of strength. Because this injury is so common, I’ve had a chance to test out these three methods (I’ve provided below) on a number of my clients. And, these three tips helped them to get out of pain and become stronger than they ever were before.

1. Lighten Your Load & Respect Your Limits

First things first: Chill out a little. Crank up the volume on submaximal lifts, and work within your limits. That means if you feel any pain in any movement, it’s beyond your current limitations.

Depending on how recently and seriously you’ve gotten hurt, you may not even be able to pick a pencil off the ground. Whatever you can do, that is where you will start. If you have to place a kettlebell on a box so that it’s only a few inches to the lockout of a deadlift, so be it. If recurring SI joint pain is a problem but isn’t a recent acute injury, you might be able to skip some of the easier steps and start with the bigger lifts, getting you closer to your end goal, which is getting back to the lifts you want to do.

2. Move What’s Not Moving

I’ve seen the most SI joint issues with people who do almost all of their lifting in the same planes, and include the least variety of movement. Moving exclusively in the saggital plane, the squat, deadlift, and swing keep the spine locked in a vertical column, often in slight extension, which is considered the safest position. While this is a good thing for a max-effort lift, we have to retain all the functions of a healthy spine to be able to move without pain. The spine is intended to flex, extend, rotate, and laterally flex. This is non-negiotable. The important piece is respecting your limits. Adding variety and changing the way you lift and move will help you regain ranges of motion you’ve lost. Worth noting: Single-leg variations are nice, but if you examine the motions they are virtually identical to bilateral variations of the same movement, and in fact involve even more rigidity in the same plane. Thus, they may exacerbate SI joint pain. If you’re currently in pain, asymmetrical lifting will give your joints more room to move, while other movements with rotation, anti-rotation and other ranges of motion will help make you stronger in every direction. Get going with these exercises.

Bodyweight Side Bend:

If it seems too simple, it might be because you never do it. A side bend will introduce lateral flexion of the spine, a movement very rarely.

Stand with your hands by your side, and point your fingers down to the floor. Reach down as far as you easily can, then stand back up alternating sides.

Lying on the floor and doing the same side bends is another good variation, that will force you to use lateral flexion, rather than any front to back flexion or extension of the spine.

Standing Alternating Toe Touch:

Straight out of the 1987 Crystal Light National Aerobic Championships, the standing alternating toe touch is a simple exercise with high payoff. The rotation and forward flexion required in this exercise is lost for many people.

Standing with your feet about shoulder-width apart, bend over, and — rounding your back — reach past the outside of your left ankle with your right hand. Reach as far as you easily can, and then stand back up. Alternate sides, reaching as far as you easily can each rep.

Round Your Back:

I know this will ruffle feathers in some circles, but if the spine wasn’t meant to move it would be a bone. Unloaded rounding of your back in both flexion and extension will train ranges of flexion and extension you don’t normally use. The danger in flexion (or extension) occurs at extreme end range of motion with high loads. In his research, Stu McGill found that strongmen are able to “lock” their spines in a rounded position, but not so rounded that it’s in the danger zone. In other words, their back muscles protect their spine by keeping it within its limits. You might not be a strongman, but your function is the same — your limits are just different. Since you won’t be approaching true end range of motion, and won’t be using anything more than bodyweight, this movement is as safe as any exercise can be. Flexing and extending the spine also provides a pumping action for nutrient-rich cerebrospinal fluid that has no other pump like the heart. Try these two exercises to round in both directions:

Tuck Roll for Flexion:

Tuck yourself into a tight ball and roll forward and backward on your back. If you “clunk” as you roll across one section of your spine, you’ll know that your spine isn’t rounding into an arch. This provides a quick and easy way to assess your progress in restoring spinal flexion.

Wall Walk Bridge for Extension:

The easiest starting point for extension is bridging by walking your hands down a wall you’re facing away from. Don’t go any farther than you’re stable in and comfortable with. Experiment with and explore other bridging progressions once you’ve mastered this.

3. Get Strong in Awkward Positions

Jefferson Lift:

One of my favorite asymmetrical deadlifts is the Jefferson Lift, or Straddle Deadlift. This lift involves stepping over the bar, introducing an offset foot position and rotation through the spine. Lifting in this disadvantaged leverage position will not only help train unused spine angles, but it will also transfer to your traditional deadlift variations.

Set-up is highly individual depending on body leverages and limb lengths. Stand behind the barbell, and step over the bar with your right foot (you’ll switch sides the next set). Your left hand will supinate (palm facing forward), so that your grip is mixed, making the bar easier and more comfortable to hang on to. Your right hand will remain palm facing backwards. Bring your hands down to meet the bar, then adjust your feet, widening your stance if you need to (just make sure no one is in the bathroom stall next to you) until you feel like you have a strong leverage position on the bar. Your knees will track over your toes, but the foot direction is up to you and your leverages. Your upper torso will be rotated to the right. When you feel like you’ve found the strongest leverage, stand up with the bar. Yes, it remains between your legs. No, you will not smash your bits (unless you have incredibly short arms).

Russian Hockey Deadlift:

Introducing rotation from a symmetrical foot position loads up your tissue almost completely on one side, and involves extension and rotation to lift the weight. For those who are strong enough, going heavy provides extra excitement in this lift.

Start out with a dumbbell or kettlebell that’s only about one-sixth of your max deadlift, place it to one side of your body next to the outside of your foot. Hinging at the hips, bend over to the side and grab hold of the weight. In one motion, stand up to the top of the deadlift with the weight in the center of your body as if you were deadlifting normally. Set the weight down on the opposite side. Reset yourself, and pick the weight up again, moving it from one side to the other repeatedly. Properly performed, this only involves a slight rotation in the spine, and very little if any forward flexion or ‘rounding.’

Weighted Side Bend:

Now that you’ve regained a lost movement with the bodyweight side bend listed before, it’s time to add some resistance to your lateral flexion.

Starting with a dumbbell or kettlebell that’s about one-eighth of your max deadlift, reach as far down as you easily can, stand up straight, and alternate sides.

Make More Progress

If you suffer from SI joint pain, chances are you’ve been locked into the same ranges of motion for too long. In a recent article, Tony Gentilcore noted a trend in his clients that too much extension seems to be just as bad as not enough. Getting stronger in awkward leverages in more ranges of motion will pay off no matter what. If your goal is to move as much weight as humanly possible, we’ve found that getting stronger outside of the “ideal position” will carry over to your traditional lifts.

Additionally, I won’t claim to have a cure for all types of Lower back/ SI pain, but by examining the most common movement patterns associated to people being in SI joint pain, in my experience we can often find a solution.

Using the exercises provided above, we’ve been albe to improve and even “fix” many SI joint pain case , which is why we keep them in our programs to add variety to the training and resiliency to our client’s bodies.

Finally, it’s a good idea to always reassess what you’re doing in your training and think about what you might be missing, before it’s too late.

References:

McGill SM, McDermott A, Fenwick CM. Comparison of different strongman events: trunk muscle activation and lumbar spine motion, load, and stiffness. J Strength Cond Res. 2009 Jul;23(4):1148-61.

Filed Under: Blog

  • « Previous Page
  • 1
  • …
  • 5
  • 6
  • 7
  • 8
  • 9
  • …
  • 82
  • Next Page »

Olive Oil

Upcoming Workshops

    No events to show

Search

David Dellanave

David Dellanave, known most often as ddn, is a lifter, coach, and owner of The Movement Minneapolis in the Twin Cities. He implements biofeedback in training; teaching his clients to truly understand what their bodies are telling them. He’s coached a number of athletes who compete at the international level in sports ranging from grip to rugby, and his general population clients readily demonstrate how easy it can be to make progress.

Latest Tweets

  • Just now
  • Follow me on Twitter

Important Pages

  • Coaching
  • Seminars
  • Disclaimer
  • Terms of Service
  • Privacy Policy

Comments

  • david on 3 Tips for Lifting While Sorting Through SI Joint Pain
  • David Brochin on 3 Tips for Lifting While Sorting Through SI Joint Pain
  • Ken on How to Pass the RKC Snatch Test
  • Bethuel Njoroge on Wild Game Hunting: Inhumane or The Most Humane?
  • Jennifer Matthews on 3 Tips for Lifting While Sorting Through SI Joint Pain

Copyright © 2026 · Generate Pro Theme on Genesis Framework · WordPress · Log in