ddn

David Dellanave

  • Blog
  • Programs
  • Coaching
  • Seminars
  • Contact

by david Leave a Comment

Movement Concussion Protocol

Movement Concussion Protocol

Disclaimer: The following should in no way, shape, or form be construed as medical advice. I am not a doctor or neurologist and do not play one on the Internet. If you have suffered a concussion, or believe you may have a concussion, seek medical attention first. Once you are cleared to exercise, this may be a useful strategy to return to full function.

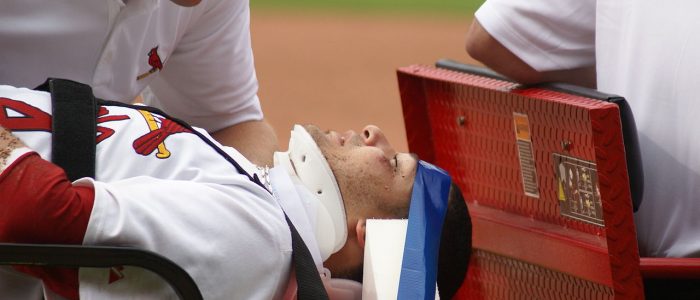
Concussions, or mild traumatic brain injuries, can be phenomenally destructive and disruptive events. If you’ve ever had one, you know how awful the effects can be, and if you’ve never had one you should continue doing your best not to hit your head.

All of the reasons concussions cause ill effects are not only unknown, but well beyond the scope of this article. However, one of the systems that can be significantly negatively impacted is the visual system. Symptoms of visual dysfunction following head trauma can include “headache, eye pain, difficulty reading, dizziness, focusing issues, and double vision.”

In my own words, here is what I believe goes on after a concussion, and what we can do to improve it. Following an injury, much like a muscular injury, there is a rigidity and a loss of function in the visual system. It can become so stressful to use an impaired function that it’s actually distress to utilize it. Because we use our visual system extensively in day-to-day life, if there are distressful functions then we are unknowingly piling on the distress just by doing normal tasks.

Imagine injuring your shoulder but absent any obvious pain or indication that you shouldn’t be doing some things you keep using it to pick things up, put them overhead, push, and pull. Eventually you’re going to do even more damage.

It’s been my experience at the gym that we can use biofeedback and simple movement to address these visual dysfunctions and re-train the abilities that are impaired or missing. The best part is that it’s totally non-invasive, often can be done in concert with your normal training, and often works extraordinarily quickly.

The Framework

There are two parts to using biofeedback to improve eye tracking after a concussion. The first is understanding the different “modes” that place different demands on the visual system. The second is that each motion and position of the eye is different, and some will test well while some will not. The goal is to find the functions that test well, and move towards the ones that currently do not.

There are 7 distinct “modes” in which demands are placed on the visual system, approximately in order of how much stress they place on the visual system.

  • Body not moving with eyes tracking an object, non-moving background
  • Body not moving with eyes at fixed point, moving background
  • Body not moving with eyes tracking object on non-moving background
  • Body not moving with eyes tracking object on moving background
  • Body moving with eyes at fixed point, non-moving background
  • Body moving with eyes at fixed point, moving background
  • Body moving with eyes tracking object on non-moving background
  • Body moving with eyes tracking object on moving background

It’s my experience that the body staying at a fixed place and demanding that the eyes track either a specific object, or a background of moving objects is the least visually demanding or stressful task on the spectrum. The most demanding is the body moving, while tracking a specific object against a moving background. In a gym context, this means you’d want to start with someone facing a blank wall, with nothing moving in their visual field and move from there.

If this hierarchy proves to be true, it’s easy to see why people who have had concussions can find daily life excruciatingly hard to get through – seemingly simple tasks like driving a car or moving around a busy office are taxing at the highest level.

How to Implement

The testing procedure is the same as you would use with any exercise. Check the range of motion to determine a baseline. Move into a position, or perform a movement. Re-check range of motion to determine better or worse.

The goal, then, is to use biofeedback testing to determine where the person currently is able to move and function.

For example, the first thing to test would be, does it test well to stand facing an empty room with eyes fixated on a certain point?

If so, test looking at a point to the far right of the person, as well as a point to the far left of the person. In this way, you can establish the “boundaries” of the visual system in this least stressful task.

Keep in mind that you can, and should, also test the up and down limits of the eyes.

Next, you would test various directions of tracking movement against a solid, non-moving background such as an empty room. You will probably need a partner for this, to hold up a finger, or an object and move it in the various directions for you to track it.

For example, testing tracking an object moving from the far right of the visual field to the center. Moving from the far left of the visual field to the center. And then moving from center out to the extremes of the visual field.

Again, you can test vectors in 360 degrees including up and down, and the far corners.

While it seems like this could be virtually endless, you’ll find that very quickly you can start to understand where the limitations in function are, and it’s only necessary to test a few regions or vectors to confirm your hypothesis.

What you’re looking for are things that test really badly – for areas to avoid moving and to work towards, and things that test really well so that you can move more in those positions.

Next you would incorporate a moving or changing background into the same series of tests. Some people with concussion symptoms absolutely can not handle anything in this configuration when first starting out. If so, you would regress to the non-moving or empty room background and start working there.

To determine the limitations and boundaries of the visual system you’d continue through all of the different modes until you find where the person’s function falls off. In a highly functional individual who is perhaps only experiencing very mild symptoms, they may only have problems with the most complex task – moving and tracking an object against a moving background.

On the other hand, a person with a severe concussion or a history of head injuries may not be able to do a simple exercise such as a squat or deadlift while facing in towards a room full of moving people such as in a busy gym. Fortunately, it’s pretty easy to simply turn them around and have them face a wall to do their movements.

Using the information gathered in this testing session, you can begin to determine an action plan for moving where they can, so they can move where they can’t.

For example, I recently worked with one of my Movement Minneapolis clients, Maggie, after she slipped and fell on some Minnesota ice and hit her head. We started working on visual variations and drills because she was unable to find any movements that tested well, and hadn’t worked out in several weeks.

After working through the protocol above we discovered that  Maggie had no trouble moving her body through space while keeping her eyes in a relatively fixed position, but ONLY if she was looking up and to the right. Looking straight forward or to the left not only tested badly, but actually made her feel bad instantly – exactly what she had been experiencing when trying to exercise before working on these visual drills. In fact, she was able to discover that if she had the left side of her body facing towards a wall – in other words, so there were no distractions coming from that direction – she did the best of all.

Eventually the progression was from up and to the right, to just to the right, to straight ahead. By the time the ability to look straight ahead was regained, looking to the left was no longer a problem and Maggie no longer had to test any visual modifications and was back to functioning totally normally.

One thing to point out is that once you’ve determined the limits of the visual system most of what you’ll be doing is applying variations to your existing training and movements. For example, if you’re working within any of the modes of the body moving, with eyes on a fixed point, you’re really just describing exercising while keeping a particular focus. Only in the eye tracking modes would you need to specifically work on a drill such as following an object that a partner is moving, or something like catching a ball tossed from a particular direction.

It’s All The Same

Regular readers of my writing in biofeedback will recognize this approach as familiar. Besides the fact that the eyes are directly mediated by muscles and can be trained as such, the reality is that most of the functions of the body can be trainer in the same manner.

What can I do?
What can’t I do?
How can I get closer to what I can’t do, by doing what I can do?

Filed Under: Blog

by david Leave a Comment

How to Keep a Training Journal or Notebook

How to Keep a Training Journal or Notebook

One of the simplest and most effective things you can do to improve the success of your training is to keep a journal or notebook. Unless you have nothing in your life going on other than training, it’s almost impossible to remember what you do in a session from one training session to the next, much less when a week or month goes by. Did you do three sets, or four? Was it 50lbs, or 55lbs? What if something is “off” one day, how can you remember if it’s a pattern or a random fluke?

If you’ve ever seen the movie Free Solo you’ll know what I’m talking about, but in it the filmmaker does a great job of dispelling the idea that Alex Honnold is just a crazy thrill seeker. His training journal plays a prominent role of demonstrating how intricately Honnold prepared for the climb, taking detailed notes on every section of the route. At one point his climbing buddy asks if he ever writes down non-climbing notes like, “I saw the biggest Juniper tree” or “I miss my girlfriend” and Alex responds, emotionless, “No, no, no.”

It’s been my experience as a coach that two things stop most people from keeping a training journal: they don’t know what the value is, and they don’t know how to keep one that makes it useful.

The value of a training journal is to have an accurate accounting of what you did, as well as a way to write notes to future you, so that you know what to do in the future. For example it’s good to know what weight you lifted last week on a particular exercise, but it’s even better to know that with the benefit of having just done it you could assess that it was too easy, or too hard. That gives you guidance for the next week to up the weight or to drop it down a bit.  This is a blunt and obvious example, but the more you take ownership of and start paying attention to your training the more you’ll get out of taking notes.

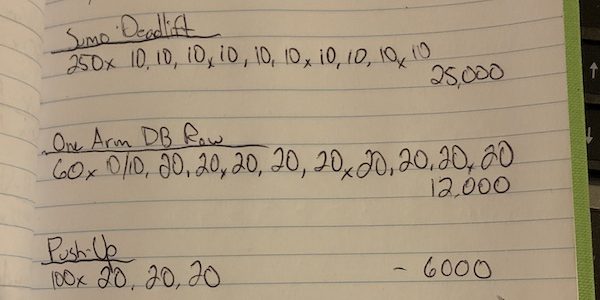
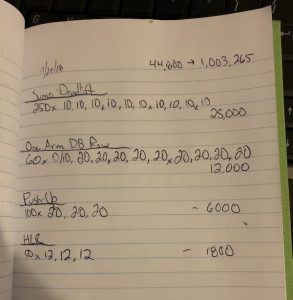
Over time you may develop your own system, but use mine as a starting point. Here’s a couple examples and then I’ll talk about the parts:

Deadlift
355 x 3, 3, 4, 3, 3   10:31

Kettlebell Press
24kg x 6/6, 7/6, 6/6     5:55

My format is always the same. I write down the movement, then the weight, then each set followed by a comma. I don’t always do the same number of reps each set, and then in the future I can easily see if for example my first few sets are better than the first few sets of a previous workout. If it’s a unilateral exercise, I write each side separately because those aren’t always identical either. Finally, I log the total time including rest.

In addition, I might scrawl some notes about what felt especially notable or different on that day – something that might be useful in the future to guide me or explain why some numbers were “off”. The beauty of the simplicity, quickness, and unstructured format of a pen and paper makes it easy to leave yourself free-form notes to future you.

If you’ve never kept a training log before, start. Do it diligently for six to eight weeks. When you do that, and you review your progress over the previous two months or so, you’ll find that you’ve made the best progress you’ve made in a long time – if not ever.


Filed Under: Blog

by david 1 Comment

Running with Biofeedback 101

Running with Biofeedback 101

Running, as a physical activity is fantastic. It’s very accessible to most people, requiring little to no equipment, and is an excellent way to improve cardiovascular health not to mention if you’re running outside it’s a great way to get outside and be in nature.

As a workout – running can be a real problem. It seems like most runners fall into one of two categories, either treating their run like a fixed routine they do at the exact same speed, distance, and route every time, or they go to the other extreme, rigidly following a running program that has them doing all kinds of things that are… not smart.

That may be a slight exaggeration of the extremes, but it’s not far off the truth. Maybe in part because of the accessibility there seems to be even more myth and lore in running than in strength training – which has plenty of its own.

The good news is, running is fundamentally not different from strength training. Movement is movement, and the principles of physiology that guide training apply to one as much as the other.

Which means that we can apply the framework of biofeedback training to train smarter for running and endurance sport, just like we can train smarter in the weight room with biofeedback.

The first tool to apply is biofeedback testing for movement. How can you test running, it’s just one movement?

Let me ask you this: is sprinting the same movement as jogging?

Of course not. They’re not just different in degree, they’re different in kind. Which means that everything in between is distinct as well. And that in turn means you can apply testing to it just as you would for movement variations.

Let’s say you can average an 8 minute mile for extended distances. Running a 7:30 is going to be pushing it for you, and it’s going to shorten the distance you’re capable of quite a bit. Likewise, an 8:30 is going to further extend how far you can go. Each of these can be considered a distinct movement for the purpose of testing with biofeedback.

Pace is also related to intensity, so for the purposes of tracking training and understanding progress, think of your relative pace, on a scale of 1 to 10 (with 10 being an all-out sprint) as your intensity.

The other primary metrics of progress are volume and density. Volume is similar to strength training in that it’s a measure of total amount of work done, in the case of running, total distance covered.

Finally, the last metric of progress, density is where we diverge from the status quo a bit. We’re going to use density to measure the total distance covered over the total time, including rest periods – a key part of strength training but something utterly overlooked in most running approaches.

In strength training it’s common to do a working set, then rest for a bit before doing the next working set. Aside from occasional hard interval work, most runners treat their training as one big block that can’t be interrupted. But that’s often not how our physiology works. Things can improve disproportionately with just a little bit of rest. Just like two short minutes of rest can allow you to complete another series of reps you would never have been able to complete otherwise, a few minutes of rest can allow you to run for another significant bout – with higher movement quality!

But, we want to account for those rest periods and to be able to track them, which is where density comes in.

To put all these metrics together I think an example will be helpful.

Let’s say you go for a 5K (3.1 mile) run. You run at a 8:30 per mile pace, and it takes you 30 minutes to complete the run. You stopped two times along the way to walk & rest, which accounts for the roughly 4 minutes longer than it should have taken at an 8:30. Your total volume is 3.1 miles, your density is 9:41, and let’s say your intensity is about a 7 because you could have run much faster if you were pushing for a shorter distance.

Now that you have a baseline understanding of how we’re going to frame running training, we can look at how to make progress.

You start each day with the same premise:

“I can PR (set a personal record) today.”

The question is, how can you PR today?

The object of the training session is to ask the right questions about how exactly you can PR. Will it be a day to run further than you ever have? Will it be a day to run faster than you ever have? Will it be a day to run further, faster than you ever have? This process of questioning is what leads you to a PR every day.

Just like in a strength session, you start by selecting your movement. Running isn’t much different, but you’ll be selecting your pace as if it were a movement. If you know you’re an 8:30/mi average runner, you might test a 8:00, 8:30, and 9:00 pace to see which pace tests the best for that day. If you know based on your training cycle or what you want to do that day you’re going to want to run longer, you’d test generally slower paces. In any case, you want to test out a few options to find the best testing pace. To test the pace, literally run for a few seconds at that pace & gait pattern, then stop and check your range of motion just like you would for a movement.

Once your pace is set, you can set out for your run. Your goal is to run for as long as you can maintain that pace without reaching into elements of excessive effort. What does excessive effort look like? Generally we look for signs of changes in speed, breathing, tension, or alignment. Think about what it feels like to go for a run. Obviously you start breathing hard right away, but there is always a point where you have to work harder just to maintain the same pace, or your breathing becomes even more difficult, or you start feeling tension in different places. Those are signs of excessive effort, which we want to avoid. When you notice one of those signs, stop!

Check your range of motion as a biofeedback test. If your range of motion is still good, or has improved, take your first rest/walk period, and then run for another interval when you feel ready.

When your range of motion is worse after a run interval, your workout is over. You might be thinking this would leave you stranded miles from home, but in reality it very rarely happens that way.

Instead, what happens when you’re running at paces that you’re responding well to, resting when you’re reaching too far, and stopping when your body isn’t responding well anymore is that you run faster, farther, longer, and with less effort. After just a few sessions you get a good handle on predicting how far you should go, and what pace would be ideal to run at based on the ups and downs of your own physiology.

The other reason your run or workout would be over, is that you set a PR. Once you do the best you’ve ever done, there’s no need or benefit in going further or doing more unless you’re in a race. Applying the minimal effective amount of training stimulus is the best way to make progress with the least amount of recovery needed.

Each run or training session you should have in the back of your mind what a natural progression from the last few sessions would be and you’ll only confirm that by doing what tests the best. Your intuition and insight from what you know you did in the past should guide you, but the idea is never to push and force an arbitrary pace, distance, or time.

As a general structure for training, the format I have seen deliver the best results at the lowest cost of recovery and wear and tear is to do two runs a week, one short and one long, as well as two strength training sessions per week.

In your short run the focus should be on increasing your speed and the distance you’re able to push your higher end speed to. In the longer runs, you’re going for maximal distance at your most sustainable pace.

In your strength training sessions you’ll want to focus on big compound movements like deadlifts, squats, pushes and pulls with a particular focus on glute strength. However, do not neglect upper body work. It’s a lot more important than you think: your arms are moving back and forth for just as many reps as your legs are – this matters!

Filed Under: Blog

  • 1
  • 2
  • 3
  • …
  • 81
  • Next Page »

Olive Oil

Upcoming Workshops

    No events to show

Search

David Dellanave

David Dellanave, known most often as ddn, is a lifter, coach, and owner of The Movement Minneapolis in the Twin Cities. He implements biofeedback in training; teaching his clients to truly understand what their bodies are telling them. He’s coached a number of athletes who compete at the international level in sports ranging from grip to rugby, and his general population clients readily demonstrate how easy it can be to make progress.

Latest Tweets

  • Just now
  • Follow me on Twitter

Copyright © 2023 · Generate Pro Theme on Genesis Framework · WordPress · Log in